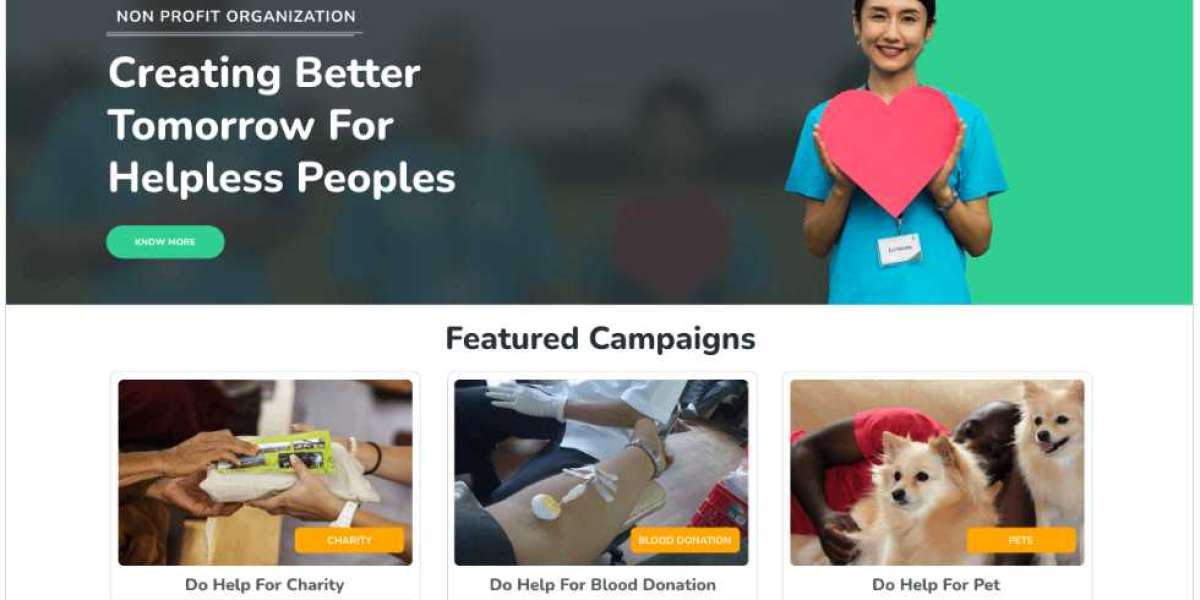
Running a nonprofit organization means every detail matters—from how you communicate your mission to how your website looks and feels. A well-designed website can help you connect with donors, attract volunteers, and share impactful stories. But many nonprofits struggle because their website doesn’t represent their vision or isn’t user-friendly.
This is where customizing a nonprofit WordPress theme becomes essential. Instead of settling for a generic design, you can tweak your theme to reflect your goals, brand identity, and audience needs. With a few strategic steps, you can create a website that is functional and inspiring.
Why Your Nonprofit Website Needs Customization
Nonprofit themes come pre-built with useful features, but they often look similar to thousands of other sites. If your design is too plain or fails to align with your mission, visitors may leave without engaging. For example, a theme that doesn’t highlight donation options clearly can hurt fundraising efforts.
To stand out, customization is key. By tailoring colors, fonts, layouts, and content blocks, you can make your website unique and effective. Using the right organization WordPress theme gives you a solid foundation, but adding personal touches ensures your message connects with people on an emotional level.
Step 1: Choose a Reliable Theme for Nonprofits
Start by picking a theme specifically designed for nonprofits, charities, or NGOs. These themes often include built-in donation systems, event management, and volunteer sign-up forms. Check if the theme supports responsive design, SEO optimization, and easy integration with donation plugins.
Look for features like customizable headers, multiple homepage layouts, and accessibility compliance. This will save you time later when you begin the customization process. A good organization theme provides flexibility without requiring heavy coding knowledge.
Step 2: Set Up the Theme on Your WordPress Site
Once you’ve chosen the theme, install it through your WordPress dashboard. Go to Appearance → Themes → Add New, then upload your theme file and activate it. After activation, import the demo content if the theme offers it. This gives you a structure to work with instead of starting from scratch.
Before making any changes, set up a child theme. This ensures that your customizations remain intact when the theme updates. Many nonprofits skip this step and end up losing their changes later.
Step 3: Customize the Layout and Colors
Your website should reflect your organization’s mission visually. Start by changing the color scheme to match your brand. For example, if your nonprofit focuses on environmental causes, use green tones combined with earthy colors.
Next, tweak the layout to make navigation easy. Place the donation button in a prominent position, like the top-right corner or the header section. Customize menus so visitors can quickly find key pages like “About Us,” “Programs,” and “Donate.”
Step 4: Add Compelling Content and Images
Content is the heart of your nonprofit website. Write clear, inspiring copy for your homepage, mission statement, and donation pages. Use high-quality images that showcase your impact—photos of volunteers, beneficiaries, and events work best.
Make sure your homepage includes a strong call-to-action, like “Support Our Mission” or “Join Us in Making a Difference.” Adding a hero section with a powerful image and tagline can immediately capture attention.
Step 5: Optimize for Donations and Engagement
Your website should make donating as simple as possible. Use a secure donation plugin like GiveWP or Charitable. Add recurring donation options, progress bars, and thank-you messages to encourage more contributions.
Also, integrate event calendars for upcoming campaigns and social sharing buttons for better outreach. If your nonprofit runs membership programs, add a dedicated section for sign-ups. These features build trust and engagement with your audience.
Step 6: Test for Speed and Mobile-Friendliness
A slow or unresponsive website can frustrate visitors and reduce donations. Use tools like Google PageSpeed Insights to check your site speed. Optimize images, enable caching, and use a lightweight theme design to boost performance.
Make sure your site is fully responsive. Test it on different devices and browsers to ensure every visitor has a smooth experience. Mobile-friendliness is crucial since many donors browse and contribute via smartphones.
Step 7: Add Security and Backup Measures
Nonprofit websites often handle sensitive donor information, so security is non-negotiable. Install SSL certificates and use security plugins like Wordfence. Set up automatic backups to prevent data loss in case of server issues or cyberattacks.
Final Thoughts
Customizing your nonprofit WordPress theme is more than just a design choice—it’s a strategic move that can amplify your impact. A well-tailored website tells your story, inspires trust, and drives engagement. By following these steps, you can transform a simple template into a powerful platform for your cause.
Take time to choose the right theme, make it visually appealing, and add features that encourage donations and participation. When your website reflects your mission clearly, your audience is more likely to support your efforts.