Choose the Right Spot
When planning circular brick patio patterns, choosing the right spot is key. A flat area makes the job easier, but you can still build on a slope with a little extra work.
Think about how you’ll use the space. Want a sunny spot for morning coffee? Or a shady retreat for summer afternoons? Pick a location that matches your needs.
Try not to place your patio too close to trees. Roots can lift bricks over time, ruining your circular pattern. Also, falling leaves can stain the surface if not cleaned often.
Measure and Mark the Circle
Use a tape measure, string, and a stake to mark your circle. Here’s how:
Drive the stake into the center of the area.
Tie a string to the stake.
Stretch the string out to your desired radius.
Walk around the stake with spray paint to draw the full circle.
This gives you a perfect guide to follow as you dig and lay bricks.
Dig and Prepare the Base
Dig about 6 to 8 inches deep within your circle. This depth allows space for gravel, sand, and the bricks themselves.
After digging:
Lay down about 3-4 inches of gravel.
Pack it tight using a hand tamper or plate compactor.
Add 1-2 inches of sand on top and level it out.
This solid base keeps your patio stable and prevents bricks from shifting over time.
Pick the Brick Style
For circular brick patio patterns, you’ll want bricks with curved edges or wedge-shaped pavers. These fit together better as you build the pattern outward.
Some common pattern choices include:
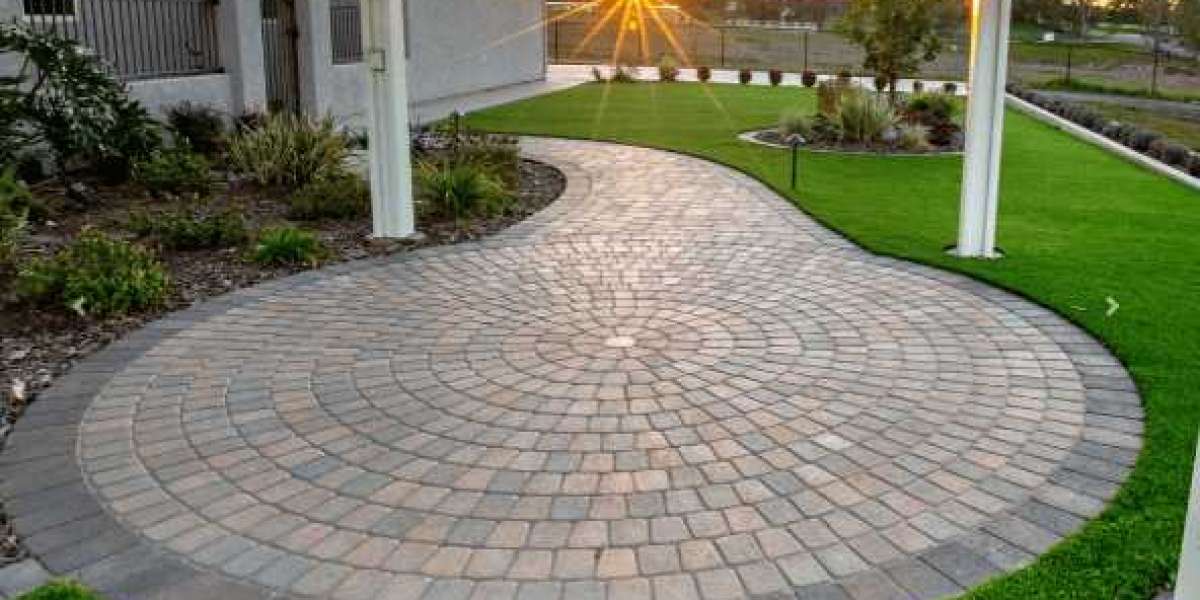
Full circles – classic and symmetrical
Spiral layout – creative and eye-catching
Fan pattern – elegant and modern
Choose one that fits the style of your home and yard.
Start Laying Bricks from the Center
Begin at the center of the circle. Place the first brick and work outwards. Keep the bricks tight, with no large gaps. For a clean look, use spacers if needed.
As you move outwards:
Follow the curve carefully.
Tap each brick gently into place with a rubber mallet.
Check level often using a small level.
Expect to make small cuts along the edges. A brick splitter or angle grinder helps trim bricks to fit neatly.
Fill the Joints
After laying all the bricks, spread polymeric sand over the patio surface. Use a broom to push it into all the gaps. Then lightly mist the area with water.
The sand hardens and locks the bricks in place. It also prevents weeds and keeps bugs out of the cracks.
Add a Border (Optional)
To make your circular patio stand out, add a border around the edge. You can use bricks in a contrasting color or a row of natural stones.
This frame adds extra strength and gives the patio a polished look.
Seal for Protection
Bricks are tough, but sealing them helps protect against stains, weather, and fading. Use a brick paver sealant and apply it with a roller or sprayer.
Sealing should be done every 2–3 years, depending on wear and weather in your area.
Design Tips to Enhance the Look
Here are a few ideas to take your circular brick patio to the next level:
Fire pit in the center – Great for chilly nights and social gatherings.
Built-in seating – Adds comfort and style.
Planters or flower beds – Frame the patio with greenery.
String lights or lanterns – Perfect for evening ambiance.
The right design details can make your patio the favorite spot in your yard.
Common Mistakes to Avoid
Even a simple project can go wrong without careful planning. Watch out for these common errors:
Skipping the base prep – Without a proper base, your bricks will shift and sink.
Poor drainage – Water pooling under the patio can ruin it over time.
No edge restraint – Bricks at the edge can spread out unless held in place.
Take your time with each step. It saves time and money later.
Maintenance Tips
Circular brick patio patterns don’t need a lot of upkeep, but a little care goes a long way.
Sweep regularly to keep dirt and leaves away.
Rinse with water if stained. Use mild soap for deeper cleaning.
Reseal every few years to keep the bricks looking fresh.
Remove weeds early before they grow deep.
With simple care, your patio can last 20+ years looking great.
Why Kingston Homeowners Love Brick Patios
Living in Kingston, Ontario means dealing with all four seasons. Bricks are strong enough to handle snow, rain, and sun. Plus, they look great with both old and new homes.
Lawn Care By Dan helps many local homeowners design beautiful outdoor spaces. We know what works in our local soil, climate, and yards.
Circular brick patio patterns are one of our favorite styles to recommend.
Final Thoughts
A circular brick patio is more than just a place to sit. It’s a feature that brings beauty, function, and value to your home.
By following the simple steps above, you can create a space that looks like it came from a magazine—without spending a fortune.
And remember, if you need help with design or installation, we’re here for you at Lawn Care By Dan.
FAQs: Circular Brick Patio Patterns
Q. How long does it take to build a circular brick patio?
A. It depends on the size, but for most homeowners, it takes 2–3 days with good weather and the right tools.
Q. Do I need to seal my brick patio every year?
A. No. Once every 2–3 years is enough unless the surface gets heavy foot traffic or harsh weather.
Q. Can I build a circular patio without cutting bricks?
A. For smaller circles, yes. But larger patterns may need trimming to fit smoothly around the curve.
Q. What kind of sand should I use between the bricks?
A. Use polymeric sand. It hardens with water, keeps weeds out, and holds bricks tightly.
Q. Can I place furniture on a circular brick patio?
A. Absolutely. Just make sure the base is solid and level so chairs and tables don’t wobble.